*The thumbnail was generated by AI using Co-pilot. All other illustrations and photos in this blog post are used under the Creative Commons 4.0 license unless otherwise noted.
In this blog, I will provide some suggestions on equipment for producing video materials in a hospital for teaching medical English. I’ve written this blog with re-enacted doctor-patient dialogues in mind, but the principles can be adapted to various situations. My aim is to explain the necessary equipment to create engaging learning materials that are clear, with minimal distractions. With good audio and well-balanced lighting, even basic digital cameras can produce very good results.
Audio: Prioritize the sound quality
In my view, sound is equally as crucial to the setup as video. Poor audio can render a video distracting and particularly difficult for non-native English speakers to follow. Thus, the built-in microphone in most video cameras will not suffice. When creating a setup, one should purchase at least one microphone. When choosing a microphone, you’ll typically decide between dynamic and condenser microphones.

Dynamic Microphones – These are durable, reject background noise well, and work well in noisy environments. These are almost universally used at music concerts.
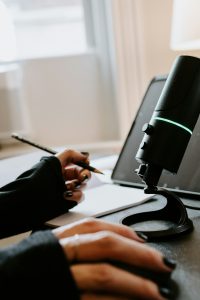 Condenser Microphones – These capture more detail and are more sensitive but can pick up unwanted ambient sounds. Some condenser mics can also be plugged directly into the video camera, reducing the weight and size of your setup. With a dynamic microphone, this isn’t possible.
Both dynamic microphones and condenser microphones come in many shapes and sizes such as a boom microphone or a lavalier microphone (pictured below). If you want to record a situation where there are many people in the video (a team of nurses and doctors, for example), a boom microphone can be useful for picking up audio from various sources. For doctor-patient recordings, a lavalier (clip-on) microphone can provide clear, close-up audio without being intrusive.
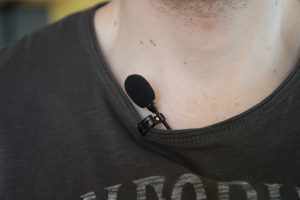

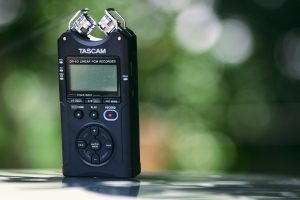
In order to connect a microphone (most of them, at least) to your video camera, you will need something called an audio interface to convert the audio signal from analog to digital and ensure the sound is clear, with adequate volume. Other features allow a user to adjust the amount of background noise, adjust pitch and frequency of the subjects voice, etc.
Lighting: The 3-Point Setup
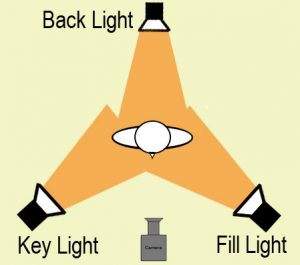
Good lighting ensures clear visuals, even if you’re using an affordable camera. There are many ways to set up lighting for a particular shot, but we will focus on the most basic of them. The 3-point lighting setup is an easy and effective way to achieve a professional look. The three lights are described as follows:
Key Light – The main light source, positioned at a 45-degree angle to the subject(s), providing primary illumination.
Fill Light – Placed on the opposite side of the key light, this reduces shadows and evens out the lighting.
Back Light – Positioned behind the subject, this separates them from the background and adds depth.
Inexpensive LED panel lights or softboxes can drastically improve video quality.
Choosing a Camera: not the most critical factor
While a high-quality camera is nice, it is not essential if your audio and lighting are well-managed. Current smartphones outperform many expensive digital cameras from ten years ago and many budget-friendly cameras can capture sufficient video quality. Focus on stability (using a tripod), proper framing, and the correct exposure settings to maximize results.
Audio and lighting are affordable and can help you achieve professional-looking recordings without an expensive camera. Prioritize clear sound, eliminate shadows with 3-point lighting, and use a stable, basic camera setup to achieve excellent results on a budget.
My setup (overkill, I know)
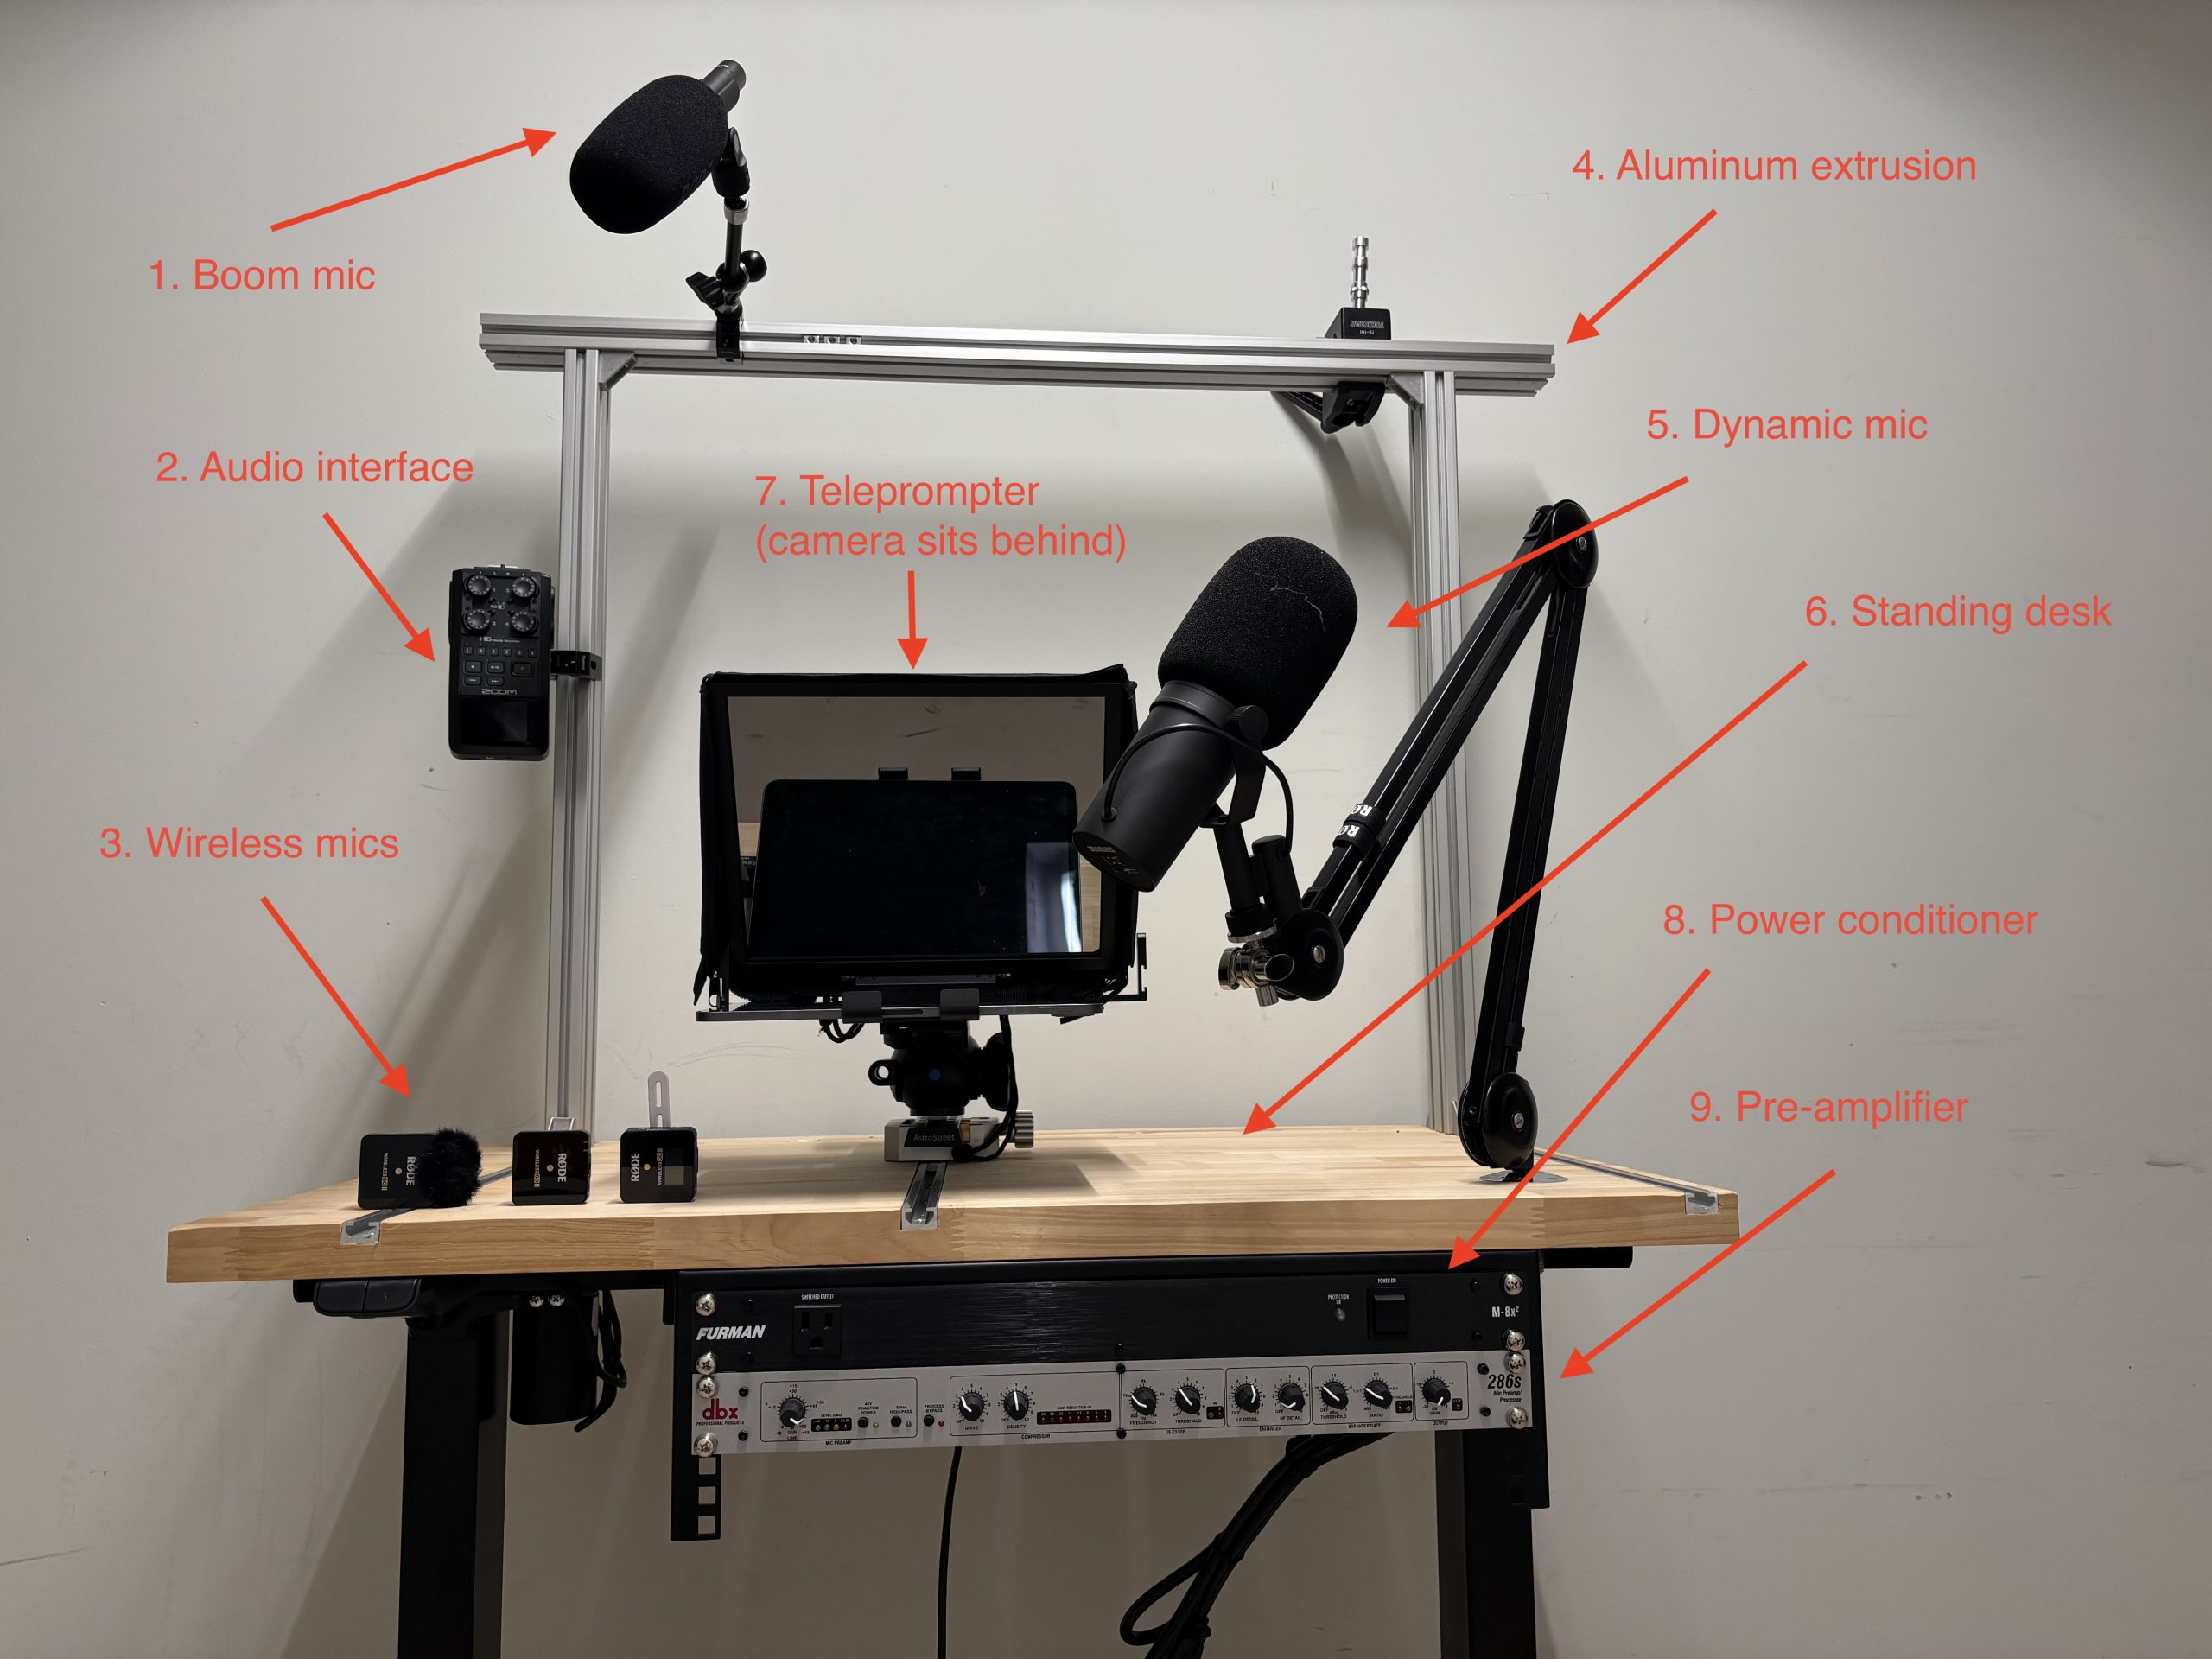
The following camera setup is far more than one would need to produce good results, but I will share it here because it includes all of the equipment mentioned in the article. It is built on wheels for easy transportability throughout the hospital. The idea was to make something that could be switched on and be ready to record immediately (Note: in the photo, nothing is plugged in. This photo was taken for demonstration purposes only.)
- Boom mic – this is attached to the frame, and can pick up noise from various sources. I would use this if people were moving around a room and not confined to a static area. Also, if I wanted to pick up dialogue from multiple people using only one source, this would be my choice.
- Audio interface – This is a portable device that can also be used as a digital recorder for interviews, etc. This plugs in to the digital camera and will perform much better than the audio recorder that is built into most cameras.
- Wireless mics – These would probably be the best option in a very quiet room when recording doctor-patient dialogues.
- Aluminum extrusions – The frame for this contraption is made from aluminum extrusions. This allows for easy clamping of equipment in various configurations.
- Dynamic mic – For quality, this is the best microphone you will have available. However, the speaker’s mouth must be very close to the microphone at all times. I use this for introductions or monologues, where there is only one speaker being recorded.
- Standing desk – The desk that all of the equipment sits on is a standing desk, which can be raised and lowered electrically.
- Teleprompter – The camera sits behind a teleprompter which displays the dialogue in text. This is really worth the time saved from having to re-record when someone forgets their lines!
- Power conditioner – This is basically a power strip that is designed to reduce the noice that can be generated by the electrical current. It ensures that the recording devices don’t pick up unwanted humming sounds.
- Pre-amplifier – This is probably the most unnecessary piece of this setup, as the audio interface (2) already performs the same task. However, this pre-amplifier can be set to eliminate unwanted sounds (think cars driving by and someone talking in the next room over).
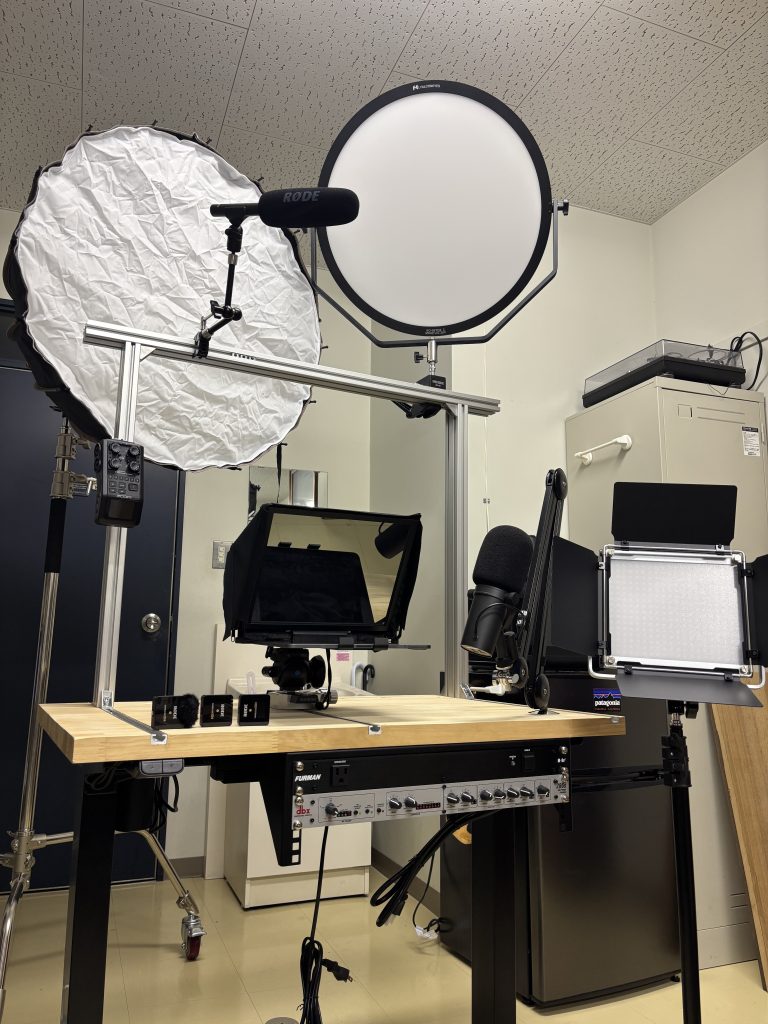
Finally, here are some of the lights that I use. The large one on the left and the one attached to the aluminum frame can be used interchangeably as the key light and fill light. The small light on the right can be used as a backlight, but honestly, I rarely use it. Most hospital rooms are well-lit anyways, so it probably won’t make much of a difference in most cases.
While this is probably too much equipment for most, hopefully this article has helped to explain some of the details for recording video that can be of a higher quality than you would normally get by using just a camera.
Creating a Video Recording Setup for Doctor-Patient Dialogues on a Budget © 2025 by Marshall Higa is licensed under CC BY-ND 4.0
